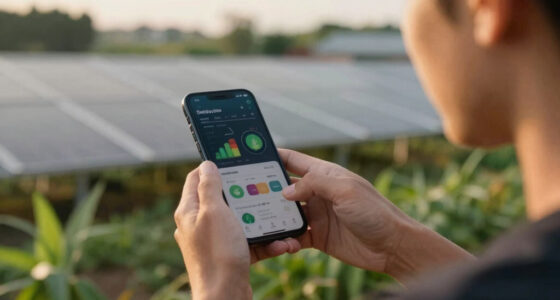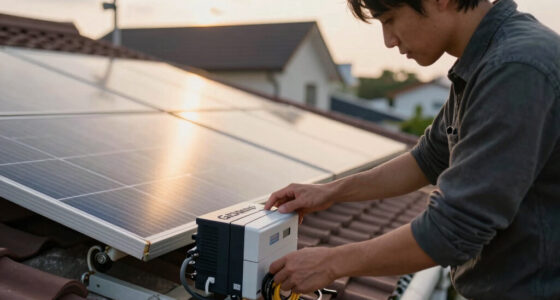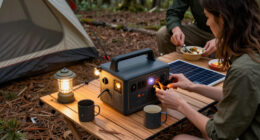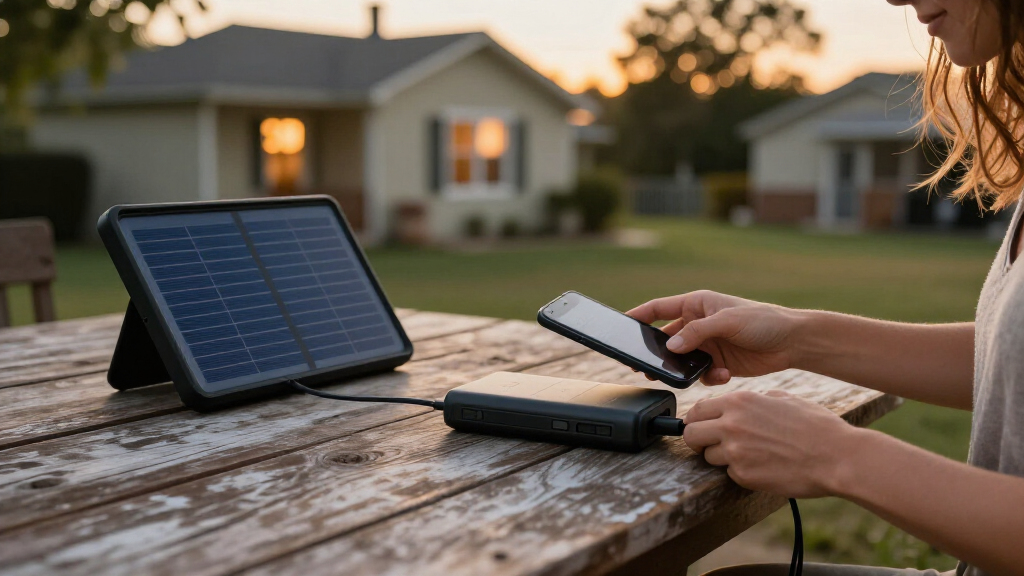

Set up and test a solar power bank before an outage so you know how to charge it, which devices it can support, and what to expect from its solar panel. This guide is for beginners preparing a phone and small USB devices for emergency backup. Allow about 1-2 hours for setup and testing; a full solar recharge can take much longer and depends on sunlight and the model.

Get backup power and energy gear delivered free — and shop member deals
- Fast, free delivery on millions of items
- Access to Prime Big Deal Days deals on October 6–7
- Prime Video, Amazon Music and more included

FEELLE 50,000mAh Solar Power Bank with Magnetic Wireless Charging and Hand Crank
- ✔ Battery capacity: 50,000mAh
- ✔ Battery cell type: Lithium polymer
- ✔ Wireless charging: Magnetic, up to 15W

SOARAISE 48,000mAh Solar Power Bank with Wireless Charging and 4 Built-In Cables
- ✔ Capacity: 48,000mAh
- ✔ Battery type: Lithium-polymer
- ✔ Solar panels: 4

BLAVOR 10,000mAh Solar Power Bank with Wireless Charging
- ✔ Capacity: 10,000mAh
- ✔ Battery type: Lithium-cobalt
- ✔ USB-C output: 20W
Difficulty: Beginner | Time: 1-2 hours for initial setup and testing; solar charging may take a day or longer
What You’ll Need
Tools & Materials:
- Solar power bank with a built-in panel or compatible solar panel
- USB charging cable that fits the power bank
- Phone or other small device to test
- Wall charger or USB power source for the initial full charge
- Device manuals or product labels showing battery capacity and charging limits
Knowledge:
- Basic ability to connect USB cables and check a device’s battery level
- Ability to read the power bank’s ports, indicators, and safety instructions
Check that the power bank is intended for your device’s charging method and voltage. A typical USB power bank can charge phones and other small USB devices, but it cannot directly power household appliances that need AC outlets. Solar charging is usually slower than wall charging; treat the panel as a way to extend backup power, not a guaranteed rapid recharge.
FEELLE 50,000mAh Solar Power Bank with Magnetic Wireless Charging and Hand Crank
For a household outage kit or a trip where several devices may need backup, FEELLE combines the largest stated capacity in this group with the widest emergency toolkit. Its 50,000mAh battery is slightly larger on paper than SOARAISE’s 48,000mAh, and four built-in cables plus three ports reduce the need to hunt for separate leads. Magnetic wireless charging adds convenience for compatible phones, although thick cases can interfere with the magnetic hold and charging efficiency.The differentiator is redundancy: FEELLE adds a hand-crank generator, compass, and three-mode flashlight, including SOS and strobe. Those features make it more preparedness-oriented than the SOARAISE, whose emphasis is four solar panels and charging as many as seven devices. Still, neither the crank nor solar panels guarantee a quick refill; the description gives no solar charging rate, and crank output depends on effort. Its thick, feature-packed design is also less appealing for a light day bag than the BLAVOR. We would choose FEELLE when backup functions matter more than minimizing weight.
Pros:
- 50,000mAh stated capacity suits a larger emergency reserve.
- Four built-in cables, three ports, and magnetic wireless charging offer flexible connection options.
- Hand crank provides a backup charging method when normal input is unavailable.
- SOS, strobe, and steady flashlight modes add practical emergency functions.
Cons:
- Bulky construction is less convenient for a compact everyday carry kit.
- Solar and hand-crank charging depend on conditions and effort; recharge performance is not specified.
- Thick phone cases may weaken magnetic attachment or reduce wireless charging efficiency.
Best for: Households and outdoor users who want a high-capacity reserve, several ways to connect devices, and built-in signaling and lighting features.
Not ideal for: Travelers prioritizing a compact, light power bank, or anyone expecting solar exposure or hand cranking to rapidly recharge a depleted battery.
Bottom line: We rank FEELLE first for emergencies because it combines the group’s highest stated capacity with the most varied backup features, provided we can accept the bulk and keep expectations realistic about solar and crank charging.
“We rank FEELLE first for emergencies because it combines the group’s highest stated capacity with the most varied backup features, provided we can accept the bulk and keep expectations realistic about solar and crank charging.”
SOARAISE 48,000mAh Solar Power Bank with Wireless Charging and 4 Built-In Cables
SOARAISE is the most straightforward match for a shared emergency charging station: its 48,000mAh capacity and seven-device maximum are aimed at connecting several people’s phones or other compatible devices at once. Four built-in cables, two USB-A outputs, and a USB-C input/output give it broad connection coverage. Compared with FEELLE, it gives up a hand crank and the described SOS flashlight modes, but its four solar panels make solar collection a more prominent part of the design.That panel count is not proof of fast recharging. Solar performance still depends on direct light, panel positioning, and conditions, and no charging rate is provided. Its large capacity can also make it cumbersome to carry, much like FEELLE; this is better kept in a home emergency supply or vehicle kit than in a minimal pocket setup. BLAVOR is the more portable alternative and states a 20W USB-C output, but its 10,000mAh capacity is far less suited to serving a group. Choose SOARAISE when connection count matters most, not when low weight or a self-contained hand-crank backup is the priority.
Pros:
- 48,000mAh stated capacity provides substantial reserve for a group-oriented bank.
- Four built-in cables and several outputs accommodate varied devices.
- Designed to charge up to seven devices simultaneously.
- Four solar panels provide a supplemental outdoor charging option.
Cons:
- Large capacity may make the unit bulky to carry.
- Solar charging speed depends on conditions, and no rate or recharge time is stated.
- Unlike FEELLE, the supplied details do not list a hand crank or SOS flashlight.
Best for: Families, small groups, or shared kits where multiple devices may need access to charging connections during an outage.
Not ideal for: People who need a lightweight everyday carry bank, want a hand-crank backup, or require evidence of a particular solar recharge time.
Bottom line: We recommend SOARAISE when several people need charging access from one emergency bank, while FEELLE is the more complete contingency choice and BLAVOR is the easier option to carry.
“We recommend SOARAISE when several people need charging access from one emergency bank, while FEELLE is the more complete contingency choice and BLAVOR is the easier option to carry.”
BLAVOR 10,000mAh Solar Power Bank with Wireless Charging
BLAVOR takes a different approach from the two high-capacity banks: its 10,000mAh battery is a smaller reserve, but the lower stated capacity makes it a more sensible candidate for a compact go-bag or a personal backup than either 48,000mAh or 50,000mAh model. Its clearest performance detail is a 20W USB-C output, giving buyers a specified wired fast-charging option that the other product descriptions do not state in the same terms. It can also charge up to three devices at once, with wireless charging for compatible phones.The tradeoff is endurance. BLAVOR is not the pick for keeping several people’s devices supplied through a long outage; FEELLE and SOARAISE have much larger stated reserves and more built-in cables. BLAVOR instead offers an IPX5-rated design, dual flashlights, and a compass carabiner, giving it useful outdoor-kit features without FEELLE’s hand crank. The supplied details do not list dimensions or weight, so we should not assume a precise size advantage, and solar charging speed is unspecified. It makes the most sense when portability and a defined USB-C output matter more than maximum stored power.
Pros:
- 20W USB-C output is the clearest stated wired fast-charging specification in this lineup.
- IPX5-rated construction is suited to exposure to water splashes and outdoor conditions.
- Wireless charging and support for up to three devices offer useful flexibility.
- Dual flashlights and a compass carabiner add practical kit features.
Cons:
- 10,000mAh capacity is much smaller than the FEELLE and SOARAISE reserves.
- Solar charging speed is not specified.
- Dimensions and weight are not provided, limiting direct portability comparisons.
Best for: People building a personal emergency kit who value a lower-capacity reserve, rugged outdoor features, and a stated 20W USB-C output.
Not ideal for: Households needing a large shared reserve or anyone expecting an unspecified solar input to replenish the bank quickly during an outage.
Bottom line: BLAVOR is our compact-kit choice for buyers who prioritize a stated 20W USB-C output and outdoor protection over the extended reserve capacity of the two larger banks.
“BLAVOR is our compact-kit choice for buyers who prioritize a stated 20W USB-C output and outdoor protection over the extended reserve capacity of the two larger banks.”
As an Amazon Associate we earn from qualifying purchases.
Before You Start
Read the power bank’s manual before charging it, using its solar panel, or storing it. Models differ in how their indicator lights work and whether they accept solar input while charging a device. Do not use a swollen, cracked, unusually hot, wet, or damaged battery. Keep the unit away from flames and extreme heat, and do not leave it in a hot parked vehicle. If local conditions may include severe weather, keep the power bank and cables in a dry, accessible place.
Plan for a power outage in which sunlight may be limited. Charge the bank from a wall outlet while power is available, then use solar charging as a backup when conditions allow.
Step-by-Step Instructions
Step 1: Check the power bank and its charging limits
Read the label and manual to find the battery capacity, input ports, output ports, supported charging rates, and any stated water-resistance limits. Check which port accepts charging from a wall adapter or solar panel and which ports charge devices. Confirm that the supplied or compatible cable fits securely.
Compare the output specifications with the device you plan to charge. If the power bank does not support the device’s required charging method, choose another compatible power source rather than forcing a connection.
Tip: A built-in solar panel does not mean the power bank can charge every device directly from sunlight. The panel charges the internal battery, or supplies solar input in the way described by the manufacturer.
Check: You can identify the correct input and output ports and have a cable that connects the bank to your test device.
Step 2: Charge the bank from a reliable source
Connect the power bank’s input port to a compatible wall charger or USB power source. Place it on a stable, dry surface while it charges, and follow the manual’s instructions for reading its battery indicators. Leave it connected until the display or indicator shows the charge level recommended for storage or full readiness.
If the manual specifies a first-use charging procedure, follow it. Do not assume that an indicator light means the bank is fully charged unless the instructions define that signal.
Tip: Use the wall charger for the initial charge when available. Charging a large battery through a small panel can take many hours or multiple sunny days.
Check: The bank’s indicator or display shows a full or otherwise ready charge according to the manufacturer’s instructions, and the unit is not unusually hot or damaged.
Step 3: Test the output with a device
Disconnect the bank from its input source. Use the correct cable to connect your phone or another compatible USB device to an output port. Press the power button if the manual says it is needed. Check that the device displays a charging symbol, then let it charge for several minutes.
Note which port worked, whether the bank needs a button press, and how the bank’s charge indicator changes. Disconnect the test device when finished so the stored energy is available for an emergency.
Tip: Test the cable you plan to keep with the emergency kit. A damaged or unsuitable cable can make a charged power bank appear faulty.
Check: The device recognizes the power source and its battery level begins to rise during the test.
Step 4: Learn how solar charging works on your model
Find the manual’s instructions for solar input. Set the panel in direct sunlight, facing the sun as the manufacturer directs, and keep it clear of shade, dirt, and objects. Connect a separate panel only to the specified input and with the approved cable. Check the bank’s indicator for a solar-input signal if the model provides one.
Allow time for the test, but do not expect a small built-in panel to recharge a depleted bank quickly. If the bank has a solar charging indicator, confirm that it appears in sunlight and compare the displayed charge level after a reasonable period.
Tip: Clouds, window glass, low sun, heat, and even partial shade can reduce solar output. Avoid leaving the battery in direct sun if that makes it hot; place the panel in sun while keeping the battery in a shaded, ventilated spot when the design allows.
Check: The panel is positioned as directed, and the bank shows solar input or a measurable increase in charge over time. A slow increase can be normal.
Step 5: Set an emergency charging plan
List the devices that matter most during an outage, such as a phone used for calls, alerts, and maps. Decide which device gets charged first and set a low-battery threshold for reconnecting it. Turn on low-power mode, reduce screen brightness, and close unnecessary apps to make each charge last longer.
Keep the bank, a compatible cable, and any required adapter together in an accessible emergency kit. If several people may use the bank, label the output ports or write down the order for charging devices.
Tip: Prioritize communication and safety devices over entertainment. A power bank’s advertised capacity is not all delivered to a device because energy is lost during voltage conversion and charging.
Check: You have a clear priority list and can locate the charged bank and correct cable without searching through unrelated supplies.
Step 6: Store and maintain the bank
Store the power bank in a cool, dry place within the temperature range specified by its manual. Avoid damp locations, direct heat, and prolonged storage at a completely empty or fully depleted state if the manufacturer advises against it. Check the charge indicator on a recurring schedule, such as every few months, and recharge it to the recommended storage level.
Inspect the casing, ports, cables, and panel during each check. Clean the panel gently as directed, and replace damaged cables. Follow the maker’s guidance for long-term storage and battery disposal.
Tip: A power bank can lose charge while sitting unused. Set a calendar reminder to check it, especially before storm or wildfire seasons in your area.
Check: The unit is undamaged, stored within the stated conditions, and its charge level is checked and refreshed on a schedule.
Common Mistakes to Avoid
- Relying on the built-in panel to fully recharge the bank during a short outage. — Charge the bank from a wall source before an emergency. Use solar input to extend its charge and check the manual for realistic charging expectations.
- Leaving the entire power bank in intense sun until it becomes hot. — Follow the manufacturer’s placement guidance. When the design permits, keep the panel exposed while the battery rests in a shaded, ventilated location, and stop if the unit becomes unusually warm.
- Waiting until an outage to test the cable, ports, or charging instructions. — Test the bank with the actual device and cable while you have time to troubleshoot, then store the working cable with the bank.
- Assuming the bank can run a lamp, refrigerator, or other appliance. — Check the device’s power requirements and the bank’s output. Most USB power banks are for phones and small USB electronics, not household appliances.
Troubleshooting
Problem: The phone does not show that it is charging.
Solution:
Check that the bank has charge, the cable is undamaged, and the cable is connected to an output port rather than an input port. Press the power button if required. Try another compatible cable or output port, then test with a second device. Stop using the bank if it is swollen, damaged, or unusually hot.
Problem: The solar indicator does not appear in sunlight.
Solution:
Check the manual to confirm that the model supports solar input and whether it needs a button press or a separate panel. Reposition the panel in unobstructed direct sunlight, clean it as instructed, and reconnect using the approved input. Do not connect a panel to a port unless the manufacturer identifies it as a solar or charging input.
Problem: The charge level barely rises during solar charging.
Solution:
Move the panel away from shade and orient it toward the sun as directed. Check for cloud cover, dirt, or heat-related limits, and allow more time. A small panel may provide only a slow charge; use a wall source or a compatible larger panel when one is available.
Problem: The bank stops charging a device or shuts off.
Solution:
Check the bank’s remaining charge and confirm that the device’s charging needs fit the bank’s output. Some models turn off when they detect very low draw; check whether the manual describes a low-current mode. Recharge the bank, try a compatible port, and follow the maker’s instructions rather than repeatedly resetting a hot or damaged unit.
What Success Looks Like
Your setup is ready when the power bank has a verified charge, successfully charges a compatible device, and you know which port and cable to use. You should also know how to position the solar panel, understand that solar charging may be slow, and have a storage location and periodic charge-check reminder. During an outage, the bank should supply backup power to compatible small devices without signs of damage or overheating.
Next Steps
Keep the bank and tested cable in your emergency kit, then check their condition and charge level every few months and before forecast severe weather. Replace damaged cables and follow the manufacturer’s instructions for battery disposal rather than putting a rechargeable battery in household rubbish. If you need to power larger devices or several devices for an extended outage, calculate their energy needs and select a suitably rated battery or backup system instead of relying on a phone power bank.
Frequently Asked Questions
Can a solar power bank charge a phone without sunlight?
Yes. Once the internal battery is charged, it can charge a compatible phone from stored energy. Sunlight is needed only when using the solar panel to replenish the bank.
How long does solar charging take?
It depends on battery capacity, panel output, sunlight, shade, temperature, and the charging electronics. A small built-in panel can take many hours of strong sunlight or several days to refill a large bank. Follow the model’s manual and do not plan around a specific recharge time unless its maker provides one for your conditions.
Should I leave the power bank in a window to charge?
Not unless its instructions allow it. Glass can reduce the sunlight reaching the panel, while a sunny window can heat the battery. Use the panel outdoors or in the location specified by the manufacturer, and keep the battery within its temperature limits.
Can one power bank charge multiple devices during an outage?
Only if it has the required ports and supports their combined power draw. Connecting multiple devices divides the available stored energy and may slow charging or exceed the output limit. Check the manual and charge higher-priority devices one at a time if capacity is limited.
Fall Picks
fall essentials
As an affiliate, we earn on qualifying purchases.