A 20-minute home power audit helps you quickly identify energy-wasting areas with minimal guesswork. Start by reviewing your recent energy bills and noting key zones like windows, doors, and appliances. Use infrared cameras or candles to spot heat leaks and drafts, then inspect insulation and air leaks. Fix obvious issues like sealing gaps and improving insulation, while noting which upgrades will save you the most energy. Staying efficient is easier when you understand your home’s unique needs—stick around to discover more helpful tips.
Key Takeaways
- Conduct a quick review of recent energy bills to identify usage patterns and peak consumption times.
- Use infrared scans and incense tests to detect hidden heat leaks and drafts around windows, doors, and outlets.
- Visually inspect insulation levels in attic, walls, and floors to identify gaps and areas needing improvement.
- Check heating and cooling appliances for efficiency issues, including airflow, filters, and signs of wear.
- Implement immediate fixes like sealing leaks and upgrading to energy-efficient appliances, tracking progress with bill comparisons.
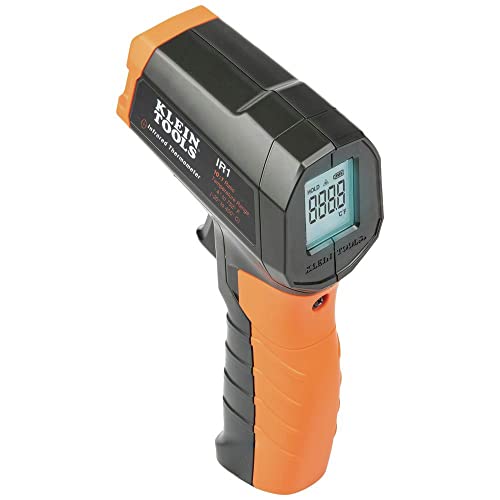
Klein Tools IR1 Infrared Thermometer, Digital Laser Gun is Non-Contact Thermometer with a Temperature Range -4 to 752-Degree Fahrenheit
PRECISE TEMPERATURE MEASUREMENT: Optical resolution (distance-to-spot) of 10:1 ensures accurate temperature readings from a distance
As an affiliate, we earn on qualifying purchases.
As an affiliate, we earn on qualifying purchases.
Gathering Your Energy Data and Identifying Key Areas

To effectively start your home power audit, you need to gather your recent energy data and identify the key areas where you can improve efficiency. Begin by reviewing your last 24 months of energy bills to spot usage patterns and peak consumption times. Compare your energy use to sector benchmarks to gauge where you stand. Take note of your meter locations and which areas they serve to understand your home’s energy flow. This helps you pinpoint high-usage zones needing attention. Also, determine your home’s conditioned square footage, so you can accurately assess energy intensity. Collecting this data gives you a clear baseline, guiding your focus on the most impactful upgrades. Additionally, understanding your home’s home theatre technology setup can help optimize energy use related to entertainment systems. Paying attention to outdoor living spaces can reveal opportunities to improve energy efficiency outside the main house. Recognizing the energy consumption patterns across different times of day can further refine your focus. Incorporating knowledge of European cloud infrastructure can also inspire more sustainable practices for managing digital devices at home. This comprehensive approach ensures you identify the key efficiency opportunities effectively. With this information, you’re ready to proceed with targeted improvements.
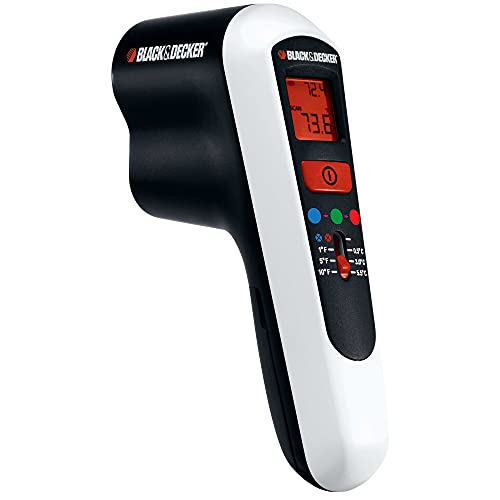
BLACK+DECKER Thermal Leak Detector (TLD100)
SAVE ON ENERGY COSTS – Track down power-draining drafts around the house to help reduce your heating and…
As an affiliate, we earn on qualifying purchases.
As an affiliate, we earn on qualifying purchases.
Using Infrared Tools to Detect Heat Loss and Cold Spots
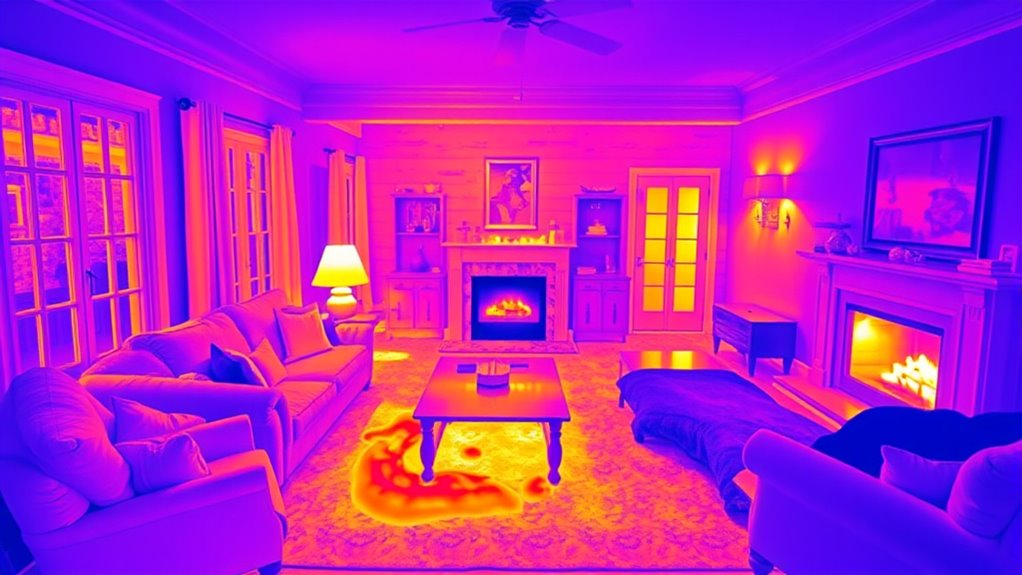
Using an infrared thermometer allows you to quickly identify areas of heat loss around your home. As you scan walls, windows, and ceilings, you’ll spot cold spots indicating insulation gaps or leaks. Focus on these key areas:
Identify heat leaks quickly with an infrared thermometer by scanning for cold spots around your home.
- Windows and doors where drafts often escape.
- Attic hatches or skylights with poor insulation.
- Exterior walls showing uneven temperature patterns.
- Electrical outlets and switch plates that may leak air.
Infrared tools reveal hidden issues not visible to the naked eye. By pinpointing these cold spots, you can target your sealing efforts more effectively. This method saves time and guarantees you don’t overlook major heat loss areas, making your home more energy-efficient with minimal effort. Effective insulation helps maintain consistent indoor temperatures and reduces energy bills. Additionally, identifying thermal bridging can further improve your home’s overall energy performance. Recognizing these heat transfer pathways enables you to address the most critical areas first and can help you understand building envelope performance more comprehensively. It’s also useful for detecting air leaks that contribute to energy loss in your home.

GDGJWL 6PCS Pipe Insulation Cutting Guide, Molded Foam Pipe Cutter Tool with 15MM-53MM Insulation Cutting Fixture for Home/Industrial/Commercial Plumbing + Bonus 59" Tape Measure (Green)
① Precision Multi-Size Cutting System Professional-grade pipe insulation cutting guide kit includes 6 ABS-molded cutters (15MM/22MM/28MM/40MM/46MM/53MM), solving diameter…
As an affiliate, we earn on qualifying purchases.
As an affiliate, we earn on qualifying purchases.
Pinpointing Air Leaks With Incense and Draft Detectors

To find air leaks in your home, light an incense stick or use a draft detector and move it around potential problem spots. You’ll see smoke or the detector respond when drafts are present, pinpointing where leaks occur. Just remember to use incense safely, keeping it away from curtains and furniture to avoid any fire hazards. Additionally, understanding airflow dynamics can help you identify hidden leaks that might otherwise go unnoticed. Recognizing pressure differentials throughout your home can further improve your ability to detect and seal leaks effectively. Being aware of exfoliation benefits from glycolic acid can also help you care for your skin after inspecting your home, ensuring your skin remains smooth and healthy. Incorporating AI-powered virtual reality in e-learning techniques can even help you learn more about home energy efficiency and leak detection strategies. Moreover, understanding home ventilation systems can optimize your efforts in sealing leaks and improving overall indoor air quality.
Detecting Drafts Effectively
Detecting drafts effectively is essential for reducing energy loss and improving home comfort. To find air leaks quickly, focus on areas like windows, doors, and outlets. Use these simple techniques:
- Light an incense stick or candle and hold it near potential leak spots; watch for flickering smoke or movement. This method helps visualize airflow accurately.
- Check around window frames and door jambs for drafts by feeling for cold air or movement.
- Use a draft detector to sense airflow in hard-to-see areas. These devices can be especially helpful in detecting subtle leaks.
- Seal identified leaks with weatherstripping, caulk, or foam to prevent heat loss. sustainable sealing materials ensure an eco-friendly and durable fix.
- Incorporate insulation techniques to further improve energy efficiency and maintain consistent indoor temperatures.
Using Incense Safely
Incense offers a simple and effective way to locate air leaks around your home. As you light the stick, watch for smoke movement—if it flicks or wavers, you’ve found a leak. Always ensure good ventilation and keep the incense away from curtains or flammable objects. Use a flashlight to help see smoke patterns clearly. Be cautious of open flames, and never leave incense unattended. Wearing gloves can protect your skin if the incense burns too hot. Additionally, using draft detectors can help confirm the location of leaks more precisely, especially in areas prone to skin irritation that may require special care. For more accurate results, consider integrating different detection methods, such as combining incense testing with electronic leak detectors, to ensure no leaks are missed. Incorporating proper safety precautions can further reduce risks during testing. Employing a peaceful environment can also improve your focus and detection accuracy during the process.

2 Pack Upgraded Watt Meter, Power Meter Plug Electricity Usage Monitor, Home Energy Monitor Consumption, Meter Sockets with Backlight, Overload Protection, 8 Modes Display
Various Monitoring Parameters: The power meter plug can monitor the power (W), energy (kWh), volts, amps, hertz, power…
As an affiliate, we earn on qualifying purchases.
As an affiliate, we earn on qualifying purchases.
Assessing Insulation Quality and Coverage
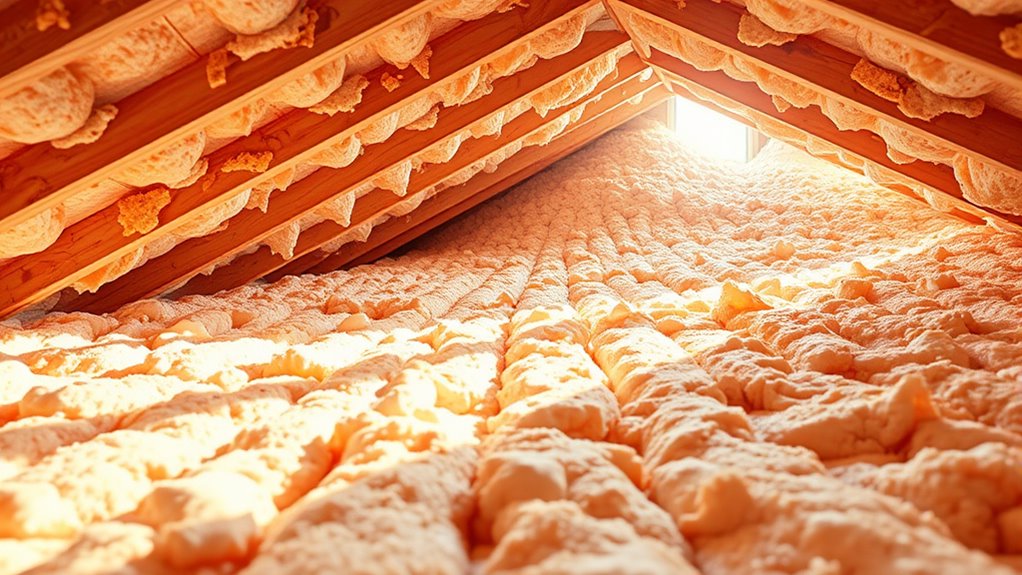
Start by visually inspecting your attic, walls, and floors for insulation coverage and signs of gaps or compression. Use a probe, like a thin stick or crochet hook, to check wall cavities and see if insulation is present and evenly distributed. Measure the insulation depth at several spots to make sure it meets recommended R-values for your area. Additionally, consider assessing the insulation quality and coverage to ensure your home maintains optimal energy efficiency. Evaluating insulation installation quality can help identify areas where improvements are needed to prevent heat loss. Proper assessment of insulation performance is essential for effective energy conservation.
Visual Inspection Techniques
A thorough visual inspection is essential for evaluating insulation quality and coverage in your home. Start by checking the attic for proper insulation depth and uniform coverage. Look for gaps, compression, or missing areas that could reduce efficiency. Next, examine accessible wall cavities by removing outlet covers and probing with a thin stick or crochet hook to see if insulation is present and evenly distributed. Additionally, inspect floors above unheated spaces, such as basements or crawl spaces, for adequate insulation coverage. Finally, review soffits and dropped ceilings for missed spots or uneven insulation. Focus on these key areas:
- Attic insulation depth and uniformity
- Wall cavity fill through outlet probing
- Floor insulation over unheated spaces
- Missed or uneven coverage in soffits or ceilings
This approach helps identify insulation gaps quickly.
Probing Wall Cavities
Probing wall cavities is a quick and effective method to assess insulation coverage and quality behind accessible outlets. Start by removing the outlet covers with a screwdriver. Use a thin stick, crochet hook, or similar tool to gently feel inside the wall cavity. If insulation is present, you’ll feel a soft material; if not, the cavity will feel hollow or cold. Be cautious not to damage wiring or connectors. Probe multiple outlets across different rooms to get an accurate picture of insulation coverage. This simple check helps identify gaps or missing insulation that may cause heat loss. While it doesn’t measure depth or R-value, it provides essential insight into the overall insulation quality behind your walls, highlighting areas that may need upgrading or additional insulation.
Measuring Insulation Depth
Measuring insulation depth is essential for evaluating its effectiveness and coverage within your walls. To do this accurately, start by selecting multiple spots in your attic, walls, or floors. Then, use a ruler or tape measure to determine the insulation thickness at each location. Here are key steps to follow:
- Identify areas with visible or suspected insufficient insulation.
- Measure the depth at least 3-5 spots for an average.
- Record measurements and compare them to recommended R-values.
- Use an insulation chart to convert thickness into R-value for your insulation type.
This process helps you pinpoint gaps, thin spots, or missing insulation, ensuring your home maintains better energy efficiency and comfort.
Inspecting Heating, Cooling, and Appliance Efficiency

Have you checked your heating, cooling, and appliances lately to guarantee they operate efficiently? Start by inspecting your furnace, air conditioner, and water heater for signs of wear or corrosion. Listen for strange noises and feel for uneven airflow. Use an energy meter to measure their power consumption and compare it to manufacturer specs. Check if filters are clean; dirty filters reduce efficiency and increase energy use. Review your appliances for age and performance; outdated models often waste energy. Replace old refrigerators or washers with high-efficiency units if needed. Ensure vents and ducts are clear and unobstructed. Also, verify that fans and ventilation systems work properly to maintain airflow and indoor air quality. This quick check helps you identify inefficiencies before they spike your bills.
Implementing Quick Fixes and Upgrades for Immediate Savings

To start saving energy immediately, focus on quick fixes that seal drafts, improve insulation, and upgrade inefficient appliances. These small changes can deliver fast results. Here’s what you should prioritize:
- Seal gaps around windows and doors with caulk or weatherstripping to prevent air leaks.
- Add or improve attic insulation to keep heat in during winter and out during summer.
- Replace outdated appliances with ENERGY STAR models for better efficiency.
- Install LED bulbs in all fixtures to reduce lighting energy use.
These upgrades are simple, low-cost, and can be completed in minutes to hours. Implementing them immediately boosts comfort and lowers your energy bills without waiting for long-term projects.
Tracking Improvements and Planning Long-Term Energy Strategies

Tracking your energy improvements is essential for understanding their long-term impact and ensuring sustained savings. Keep detailed records of upgrades, repairs, and adjustments, noting dates and costs. Review your energy bills regularly to spot trends and measure the effects of your efforts. Compare your usage to local or sector benchmarks to gauge progress. Use apps or spreadsheets to monitor consumption over time, setting clear goals for future reductions. Planning long-term strategies involves prioritizing high-impact upgrades like insulation or HVAC improvements, based on your tracking data. Consider seasonal variations and future needs, such as adding solar panels or upgrading appliances. Consistent monitoring helps you refine your approach, maximize savings, and make informed decisions that align with your home’s unique energy profile.
Frequently Asked Questions
How Often Should I Perform a Home Energy Audit?
You should perform a home energy audit at least once every 1 to 2 years. Regular audits help you spot new leaks, outdated equipment, or insulation issues that may develop over time. If you’ve made improvements or experienced significant changes, consider scheduling an audit sooner. Keeping up with these inspections guarantees your home stays energy-efficient, saving you money and reducing your environmental impact.
Can I Do This Audit Without Professional Tools?
You can do a basic home energy audit without professional tools, but your results will be limited. Use your senses—check for drafts with incense or candles, feel for cold spots with your hand, and look for obvious leaks around windows and doors. Review your energy bills and note any unusual spikes. While simple, this DIY approach helps identify major issues, but for a thorough assessment, consider professional tools and expertise.
What Safety Precautions Are Necessary During Inspections?
You should turn off power before inspecting outlets and switches to avoid shocks. Use a flashlight in dark areas and handle tools carefully. Keep ladders stable when reaching high spots, and wear gloves if you’re dealing with insulation or electrical components. Test for gas leaks with proper detectors, and be cautious around heating or cooling equipment to prevent burns or other injuries. Always prioritize safety to prevent accidents during your inspection.
How Do I Prioritize Fixes After the Audit?
Did you know air leaks can account for up to 20% of your energy costs? After your audit, prioritize fixes by tackling the biggest energy drain first, like sealing major leaks around windows or doors. Then, move on to insulation improvements and HVAC upgrades. Addressing the most impactful issues first saves you money faster and makes your home more comfortable, with each fix building on the last for maximum efficiency.
Are There Government Incentives for Home Energy Improvements?
Yes, there are government incentives for home energy improvements. You can often access tax credits, rebates, and grants at the federal, state, or local level. These programs encourage upgrades like insulation, solar panels, or energy-efficient appliances. To find current offers, check the Database of State Incentives for Renewables & Efficiency (DSIRE) or visit your state’s energy office website. Taking advantage of these incentives can substantially reduce your upgrade costs.
Conclusion
Think of your home as a well-tuned orchestra, where each note matters. With this 20-minute power audit, you’re the conductor, fine-tuning every instrument to play in harmony. By catching heat leaks, sealing drafts, and upgrading key areas, you set the stage for a more efficient, comfortable home. Just a quick tune-up now can turn your house into a symphony of savings and comfort that resonates long after the audit’s done.