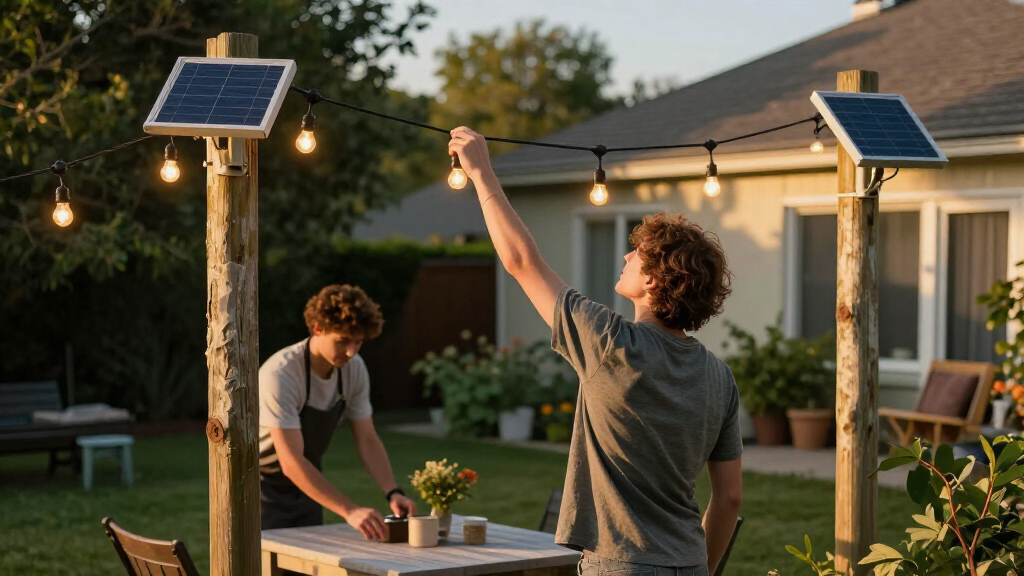
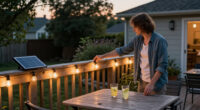
This guide shows you how to choose a suitable location, mount solar-powered outdoor string lights, position the solar panel, and test the finished setup. It is written for beginners who can use basic hand tools and want decorative lighting without running an outdoor power cord. Allow about 1-2 hours for planning and installation, then give the panel a full day of direct sunlight before judging the lights’ nighttime performance.

Get backup power and energy gear delivered free — and shop member deals
- Fast, free delivery on millions of items
- Access to Prime Big Deal Days deals on October 6–7
- Prime Video, Amazon Music and more included
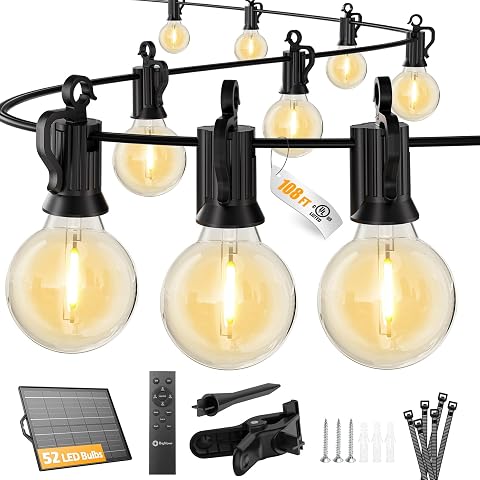
Brightown 108FT 52LED Solar String Lights Outdoor with Remote & USB Port
- ✔ Length: 108 ft
- ✔ LEDs and spacing: 52 shatterproof warm-white LEDs, 2 ft apart
- ✔ Power: Solar panel and USB-C rechargeable

50ft Solar Powered Waterproof String Lights for Outdoor Patio
- ✔ Length: 50 ft
- ✔ Power: Solar panel with optional USB charging
- ✔ Stated runtime: More than 20 hours per full charge

Brightown 100 FT Solar String Lights – 31+2 Shatterproof LED Bulbs
- ✔ Length: 100 ft
- ✔ Bulbs: 31 plus 2 shatterproof LED bulbs
- ✔ Light color: 2700 K warm white
Difficulty: Beginner | Time: 1-2 hours, plus a full day for the first charge
What You’ll Need
Tools & Materials:
- Solar-powered outdoor string lights with solar panel, mounting bracket, and supplied hardware
- Tape measure
- Pencil or removable marking tape
- Ladder rated for the height of the installation
- Screwdriver or drill with suitable bits
- Outdoor-rated hooks, clips, or cable ties if the supplied mounting hardware is not suitable
- Eye protection
Knowledge:
- Basic measuring and use of a screwdriver or drill
- Ability to identify a suitable outdoor mounting surface
- Basic ladder safety
Read the product instructions before installation. Check the string length, bulb spacing, mounting method, weather rating, and maximum distance between the panel and the lights. The solar panel needs several hours of direct sunlight; a bright but heavily shaded location may not provide enough charge. Do not install lights where they can obstruct a walkway, contact power lines, or be struck by a door or moving equipment. If you need to work near electrical service lines or on a roof, choose another route or hire a qualified installer.
Brightown 108FT 52LED Solar String Lights Outdoor with Remote & USB Port
The Brightown 108FT is our top choice when one string needs to cover a substantial patio, fence line, or outdoor seating area. Its 52 warm-white LEDs are spaced two feet apart, creating a longer, more open layout than the denser impression that closely spaced bulbs can give. That reach is the biggest reason it ranks first: the 50-foot option is easier to fit into a compact space, but it cannot provide this model’s stated coverage from a single run.Its strongest practical advantage is the combination of solar charging and USB-C backup. The adjustable 3W panel can be aimed toward available sun, and USB-C offers another route to charging when sunlight is inconsistent. Brightown states up to 36+ hours of illumination after a 4–5 hour charge, the longest stated runtime in this lineup. Treat that as a manufacturer figure rather than a promise for every brightness setting or weather pattern. The remote adjusts brightness, sets 6- or 8-hour timers, and switches among steady, breathing, and flashing modes—more explicitly detailed control than the 50-foot set offers.The tradeoff is that 108 feet is not expandable: the strings cannot be linked, so buyers needing more reach must plan a different layout rather than add another section. Brightown also notes that the solar panel needs a dark cloth over it for daytime operation if that is required, an extra step that may be awkward. Choose this model for broad coverage and flexible controls; skip it if you need a modular system or a compact, low-fuss installation.
Pros:
- 108-foot length covers more ground than either alternative in this roundup.
- USB-C backup charging complements the adjustable solar panel.
- Remote offers four brightness levels, two timer settings, and three modes.
- IP65 weather protection and shatterproof bulbs suit outdoor installation.
Cons:
- The string cannot be linked to another set to extend its reach.
- Daytime operation may require covering the solar panel.
- The long run may be excessive for a small patio or balcony.
Best for: Buyers lighting a large patio or long outdoor seating area who want remote timers, adjustable brightness, and a USB-C charging fallback.
Not ideal for: Anyone who wants to connect multiple strings end-to-end, needs a short unobtrusive set, or does not want to manage panel placement and sensor behavior.
Bottom line: We rank the Brightown 108FT first for its combination of broad single-string coverage, backup charging, and the lineup’s longest stated runtime, provided its fixed length fits your layout.
“We rank the Brightown 108FT first for its combination of broad single-string coverage, backup charging, and the lineup’s longest stated runtime, provided its fixed length fits your layout.”
50ft Solar Powered Waterproof String Lights for Outdoor Patio
Not every outdoor space needs a hundred-foot run. This 50-foot option is our pick for a patio, balcony, or modest seating area where the longer Brightown sets could be harder to route and store. It gives up coverage and the 108-foot model’s stated 36+ hour runtime, but its shorter span is a more practical scale for buyers who want a defined pool of light rather than an expansive perimeter.The useful distinction here is solar plus optional USB charging, paired with automatic dusk activation and a stated runtime of more than 20 hours after a full charge. The manufacturer lists about eight hours of direct sunlight for solar charging and four hours for USB charging. That second option can help when the panel has had a cloudy stretch, although it does require access to USB power. Four brightness levels and remote control offer more adjustment than the specs supplied for many simple short strings; the built-in manual button is a fallback, but advanced modes and timer functions are unavailable through manual controls alone.Its weather-ready design is described as suitable for rain, snow, and fog, though the listing does not provide an IP rating like the IP65-rated Brightown models. The product also warns that battery performance declines below 40°F, which makes it less reassuring for cold-weather use than its all-weather wording might suggest. Remote range may also fall short across very large properties. We recommend it when compact length and dual charging matter more than maximum reach; choose the 108-foot Brightown for large areas or the 100-foot version for a specified warm 2700 K glow.
Pros:
- A manageable 50-foot length suits smaller outdoor areas.
- Solar and USB charging provide two ways to replenish the battery.
- Automatic dusk operation and four brightness levels support routine use.
- Designed for exposure to rain, snow, and fog.
Cons:
- Stated runtime is shorter than the Brightown 108FT’s 36+ hours.
- Battery performance can decline below 40°F.
- Manual controls do not provide the advanced features, and the remote may not reach across large properties.
Best for: Patio and balcony owners who want a shorter string, automatic dusk operation, and USB charging as a backup to solar.
Not ideal for: Buyers covering a large yard, those in regularly cold conditions below 40°F, or anyone who wants every remote feature available from manual controls.
Bottom line: We recommend this shorter dual-charge set for compact outdoor spaces, but not for cold climates or installations that need extensive coverage.
“We recommend this shorter dual-charge set for compact outdoor spaces, but not for cold climates or installations that need extensive coverage.”
Brightown 100 FT Solar String Lights – 31+2 Shatterproof LED Bulbs
The Brightown 100 FT is a strong alternative to the 108-foot pick when the character of the light matters as much as the reach. Its bulbs are specified at 2700 K warm white, giving buyers a clear color-temperature target for a cozy, traditional patio atmosphere. It is nearly as long as the 108-foot model, but has fewer bulbs, so we would choose based on layout and desired visual effect rather than assuming the two strings will look equally dense.Like the longer Brightown, this set includes solar and Type-C USB charging, shatterproof bulbs, IP65 weather protection, and a remote with four brightness levels, timers, and three modes. Its stated runtime is up to 26 hours, which is useful but falls short of the 108FT model’s stated 36+ hours. That makes the 108-foot option a better fit when maximum listed runtime and more specified bulb spacing are priorities. In return, this 100-foot version offers the warmer-color specification and reported resistance to winds up to 50 MPH, a practical detail for exposed settings.Solar charging is the key caveat: a full charge requires 7–8 hours of direct sunlight, so shaded gardens may depend more heavily on USB charging. The built-in light sensor may also need the panel covered for daytime operation, adding a small management step. This is not as compact as the 50-foot set, nor does it lead on runtime, but it balances broad coverage with a defined warm glow and durable construction. Pick it for atmosphere and weather resistance; compare the 108FT model if longer runtime is the deciding factor.
Pros:
- 2700 K warm-white bulbs specify the intended cozy color tone.
- Solar and Type-C USB charging offer a backup when sunlight is limited.
- IP65 protection and shatterproof bulbs support outdoor use.
- Remote includes four brightness levels, timers, and three lighting modes.
Cons:
- The stated runtime of up to 26 hours is below the 108FT model’s claim.
- A full solar charge needs 7–8 hours of direct sunlight.
- The light sensor may require covering the panel for daytime operation.
Best for: Buyers who want a long outdoor string with a specified warm 2700 K tone, shatterproof bulbs, and remote-controlled lighting options.
Not ideal for: People with a shaded panel location who want to rely exclusively on solar, or buyers whose priority is the longest stated runtime.
Bottom line: We favor the Brightown 100 FT for buyers who prioritize a defined warm glow and robust outdoor construction over the longest runtime.
“We favor the Brightown 100 FT for buyers who prioritize a defined warm glow and robust outdoor construction over the longest runtime.”
As an Amazon Associate we earn from qualifying purchases.
Before You Start
Unpack the lights and check for cracked bulbs, damaged wire, loose connectors, or missing hardware. Keep the panel’s protective film on until you are ready to install it, if the manufacturer supplied one. Charge and operate the lights according to the product instructions; some models have a pull tab, an on/off switch, or a mode button that must be set before the lights can turn on. Test the lights outdoors or in a dark area before mounting, and switch them off while working. Do not cut, splice, or modify the light string unless the manufacturer explicitly allows it.
Step-by-Step Instructions
Step 1: Choose the light route and panel location
Walk the area during the day and mark a route that gives the lights the look and coverage you want. Measure the span between mounting points and compare it with the usable string length, including any lead wire between the panel and the first bulb. Pick a panel location that receives direct sun for as much of the day as possible, away from tree shade, roof overhangs, and walls that block sunlight. Check the proposed route from below so the string will not hang across a path or sit where people can pull or snag it.
Tip: Account for the natural drape of the string. A straight-line measurement is shorter than the wire needed for a gentle curve or swag.
Check: You have a measured route with suitable attachment points, and the panel can reach a sunny location without stretching its cable.
Step 2: Check the mounting surfaces
Inspect each planned attachment point and confirm it can support the light string without damaging the surface. Use hooks or clips rated for outdoor use and appropriate for the material, such as wood, masonry, or a fence. Follow the light manufacturer’s instructions for support spacing. If the string is long or exposed to wind, plan intermediate supports so the wire does not carry the entire load across a long span. Avoid attaching lights to gutters, fragile trim, or loose branches.
Tip: Do not drill into a surface until you have checked for hidden wiring, plumbing, or other services where relevant. Use a stable ladder on level ground, and have another person steady it when possible.
Check: The mounting points are secure, compatible with the surface, and positioned to support the string without putting strain on the bulbs or connectors.
Step 3: Prepare and test the lights
Set the solar panel and string on a dry surface. Remove any packaging or protective material from the bulbs and panel, then connect the panel to the string as instructed. Turn the unit on, select the desired lighting mode, and cover the panel completely or move it into darkness to trigger its light sensor. Confirm that the bulbs illuminate before you hang them. Turn the unit off again if the instructions recommend switching it off during installation.
Tip: Some lights will not illuminate while the panel is exposed to bright daylight. Shading the panel is a simple test; follow the product instructions if this model uses a different test method.
Check: The connectors are fully seated, the switch and mode are set, and the bulbs turn on during the test.
Step 4: Install the mounting hardware
Mark the planned attachment locations, then install outdoor-rated hooks or clips using the correct fasteners for the surface. Keep the supports aligned with the route you measured. Attach the solar-panel bracket at the chosen sunny location, leaving enough clearance to adjust the panel angle and reach its controls. Tighten fasteners securely, but do not overtighten plastic parts or split wood. Keep all mounting hardware away from power lines and electrical equipment.
Tip: If you are using adhesive clips, confirm that the product is rated for outdoor exposure and the surface is clean and dry. Adhesive alone may not hold a heavy string or withstand wind.
Check: The clips and panel bracket stay in place when gently checked by hand, with no loose or visibly damaged surface.
Step 5: Hang the string without tension
Starting near the panel or the first attachment point, place the light string into each hook or clip. Leave a modest, even drape between supports rather than pulling the wire taut. Hold the bulbs by their sockets or supported sections of wire, not by the glass or plastic bulb covers. Keep the string clear of sharp edges, hot surfaces, moving doors, and places where water pools. If the string includes a separate panel lead, route it neatly without pinching or stretching it.
Tip: Use a separate support wire or additional support points if the manufacturer recommends them for your span. Do not use the electrical wire itself as a tight suspension cable.
Check: The string hangs evenly, each support carries the wire securely, and no bulb or connector is bearing the weight of a long unsupported section.
Step 6: Aim and secure the solar panel
Attach the panel to its bracket and point its face toward the part of the sky that receives the most direct sunlight at your location. Adjust the angle according to the manufacturer’s instructions, then tighten the bracket so the panel will not rotate in ordinary wind. Route the panel cable along a protected path and secure it loosely with outdoor clips or ties. Leave enough slack at the connector for adjustment, but do not leave a loop where it can snag or collect water.
Tip: A location that gets sun only briefly may produce dim or short-lived lighting. Recheck the panel after nearby trees or seasonal shade patterns change.
Check: The panel faces an unobstructed sunny area, sits firmly in its bracket, and its cable is secure without being stretched or pinched.
Step 7: Set the operating mode and allow charging
Turn the lights on, choose the desired brightness or flashing mode, and confirm that the panel’s sensor is uncovered during daylight. Leave the panel in direct sunlight for the charging period specified by the manufacturer; when no period is given, allow a full day before evaluating nighttime runtime. Let the built-in light sensor control dusk-to-dawn operation if the model supports it. Do not cover the panel or place it behind glass unless the manufacturer says that placement works.
Tip: Cloudy weather, winter daylight, and shade can reduce charging. A single short night after installation does not always indicate a fault.
Check: The panel has had a full sunny charging period, and the lights are set to the intended mode rather than switched off.
Step 8: Verify the installation after dark
After dusk, check that the lights turn on automatically or use the product’s test procedure. Walk the route and look for dark sections, loose clips, excessive sag, cable hazards, or bulbs that could be struck. If the lights do not turn on, check the switch, mode, connector, and panel placement before moving hardware. Observe their runtime through the evening, then reassess after another sunny day if the first charge was limited.
Tip: Do not tug on the string to test it. Inspect supports visually and make adjustments with the lights switched off.
Check: The string illuminates as intended, remains securely mounted, and does not block or create a hazard along the area.
Common Mistakes to Avoid
- Judging performance before the panel has had enough time to charge. — Allow the charging period in the product instructions, ideally a full sunny day, before deciding that the setup is not working.
Troubleshooting
Problem: The string sags, shifts, or comes loose in wind.
Solution:
Turn the lights off and add or reposition suitable outdoor supports. Reduce the unsupported span and check that fasteners match the mounting surface. Replace cracked clips or loosened anchors, and take the lights down during severe weather if the product instructions call for removal.
What Success Looks Like
The solar panel is firmly mounted in a location with useful direct sunlight, the string is supported without tension or unsafe sag, and all cables and bulbs are clear of walkways and moving objects. After a full charge, the lights turn on at dusk or pass the manufacturer’s test, illuminate the intended area, and remain attached without loose hardware. Their exact brightness and runtime depend on sunlight, season, battery condition, and operating mode.
Next Steps
After the first few nights, check the mounting points and cable route again, especially after wind or rain. Clean the panel when dust, pollen, or leaves collect on it, using the method specified by the manufacturer. Replace batteries only with the type and procedure listed in the product instructions. Before winter or severe weather, check whether the lights are rated to remain outdoors; store or remove them if the instructions recommend it. Recheck panel exposure when foliage or nearby shade changes.
Frequently Asked Questions
How much sunlight do solar-powered string lights need?
Use the charging guidance supplied with the lights. In general, a panel needs several hours of direct sunlight to recharge effectively, and a full sunny day is a good first test. Shade, cloudy weather, winter daylight, and panel dirt can reduce runtime.
Can I put the solar panel somewhere separate from the lights?
Yes, if the model has a separate panel and the connecting cable reaches the sunny location without being stretched, pinched, or exposed to damage. Check the manufacturer’s cable-length and mounting instructions before choosing the route.
Why do the lights work during the day when I test them but not at night?
Daytime testing often requires you to cover the panel to trigger its darkness sensor. At night, check that the panel is not being illuminated by a porch light, and confirm that the switch is on and the connector is seated. Give the panel a full charge before retesting.
Can solar string lights stay outside in rain?
Only leave them outdoors if their product rating and instructions permit it. Check the rating for the lights, panel, connectors, and battery housing; one weather-resistant component does not make every part suitable for exposure. Keep connectors installed as directed and never immerse the equipment.
What should I do if the lights stop working after several seasons?
Clean the panel, check the connectors and wiring, and follow the manufacturer’s battery replacement instructions if the battery is replaceable. If the unit is sealed or shows corrosion, cracked parts, or damaged wiring, stop using it and contact the manufacturer or replace the set.
Halloween Picks
halloween
As an affiliate, we earn on qualifying purchases.